Friday, March 21, 2014

A Little Spring Organizing

In case you missed it, the calendar says it's spring! Too bad Mother Nature hasn't agreed!  Despite the temperature slowly creeping up the thermometer, it's definitely time for some spring cleaning and organizing.  A few weeks ago (maybe months), Stacy told me about how the clutter in her closet was getting to her, but she felt incredibly overwhelmed about where and how to start the project of cleaning and organizing her closet.  I promptly offered my help. (I'm a master organizer, if you didn't know!)  It just took us a little while to coordinate our schedules. This week, I finally went over to Stacy's to rescue her from the disaster that has been her closet.  Stacy is great at a lot of things, but well, organizing is not one of them! (Love you!!!)

Upon arrival to her house I found this:


Before: you could barely walk in her walk in closet!!


Let me just say... Oy. Vey.

Stacy and I spent the next hour and a half (the time flew by, which is why I love organizing with people!!) putting everything in it's rightful place.  The boots/shoes that were sprawled all over the floor were tucked neatly under the clothes.  Many may be wondering: "How do you decide what clothes should go where?"  That's really a personal decision.  I can only say that once you make that decision, stick by it. It will make it easier when getting dressed if all pants, dresses, shirts, blazers, skirts are in separate areas of your closet.  Even the smallest of closets (and trust me, mine is not nearly as big as Stacy's) deserves organization for all your stuff!  I go so far in my closet as to color coordinate my shirts (Stacy does that with her pants!).

Here is the final result of our efforts:


After:  Everything in it's rightful place!! 
I'm of the firm believer that if you don't wear something within a year, donate it.  Get rid of the clutter in your closet, it makes it easier to find the clothes you love and wear!  She and I went through her boots/shoes and she decided to give a bag full away.  Also, she had certain clothes that she planned on giving away, so they went in bags, which she can drop off at a donation spot this week.

All told, we had 6 bags of garbage; one bag of shoes/boots to donate; and three bags of clothing, including suits, and formal dresses to donate as well! Formal dresses can go to schools for their students who need dresses for proms.  Suits can be donated to organizations that help woman (or men) find suits for job interviews.  Other clothing you can donate to your favorite charity!  You will feel great giving your clothes to those who need it and it will give you room to get new clothing! That's a win-win in my book.

I hope eversone is ready for spring in their own way and is most definitely tackling some spring cleaning/organizing!! Good luck to you and I hope you have someone to help you with your project!!

Love,



Questions? Comments? Ideas? Email us at theaccessorizedlife@gmail.com

Tuesday, March 18, 2014

Ask the Expert #1: Hair Care

Lately, I've been getting the most outrageous knots in my hair. They get so bad that I like to call them "dread-knots." (Like dreadlocks...get it?) I'm one of those people who doesn't believe in washing my hair every day--I feel that it gets too dried out, and, to be honest, it takes me far too long to blow dry my very long, very thick hair. Now, the dread knots would typically come around after the 2nd or 3rd day of not washing my hair...but, when I don't wash it, I keep it straight, and very often, I end up pulling it back.

The knots would get so bad that I was literally tearing my hair out...to unknot it, I had to rip at it. I was at my wits end.

So, I contacted my favorite hair care professional...the amazing stylist who cuts both my hair and Lauren's hair...Carla!

I asked her what she would recommend to fix my predicament. She told me that she likes to keep haircare simple--she's not a fan of using a ton of product. That being said, she recommended some items to help moisturize, which should help eliminate my dread-knots. At her recommendation, I purchased a new shampoo, conditioner, hair brush, and a shine spray. She also recommended a spray that protects your hair from heat and helps to speed up blow drying--but I had been using this one for a few years, as she had recommended it to me before. (Product links at bottom of post.)


So...I used them. The first time around, I followed the directions on the conditioner and left it in for 3 minutes before rinsing. It made my hair feel like it was heavy--almost like I hadn't washed all of the product out. But, other than that, I was dread-knot free. Day 1...still frizzy, but better. Admittedly, I didn't use the flatiron on day 1. Days 2 & 3 (flatiron now used), no dread-knots. Awesome!

Round 2...I didn't leave the conditioner in for as long...mostly because I zoned out in the shower and forgot. But, my hair didn't feel like it still had product in it. Bonus! I used the flatiron from day 1 this time. By day 3, the dread-knot returned.

Round 3...again, no knots. I also used the flatiron on the second day. Maybe that's the key?

Honestly, I just think I'm in dire need of a haircut. (My ends are so split...probably from ripping out all of my dread-knots.) But, I'm hoping to donate my hair (I did it in June 2012), so I'm looking to avoid getting a haircut.

All in all, I love the shampoo & conditioner. They smell good, they seem to work well, and my hair is soft. The brush is good--it doesn't hurt when I brush it out like it did with my old paddle brush. It's a keeper. I like the heat protecting spray, but I always feel like that it makes my hair more frizzy. But, I use it anyway, as it helps to decrease drying time...and with hair like mine (I swear, it's like a horse's tail it's so thick!) any little help is appreciated! And, the shine spray...well, it makes my hair shiny. What's not to like?

Products:
Nexxus Therappe Shampoo
Nexxus Humectress Conditioner
The Wet Brush
KMS California Free Shape Quick Blowdry Spray
TIGI Bed Head Headrush Shine Spray


Questions? Comments? Ideas? Email us at theaccessorizedlife@gmail.com

Thursday, March 13, 2014

Remember When I Was Beautiful?

I wake up every morning and expect to see me in the mirror...you know, the me that has radiant, youthful skin. The me that has shiny, healthy hair. The me that has a tight 20-something body (who didn't appreciate it when I was 20-something and thought that even then my body was far from ideal), who looks great in all of my clothes. The me that doesn't have dark circles under my eyes and a perfect pedicure.

But, that's not what I see. I see me...the 35 year old mom of twins me. The me whose hair, even when flatironed, still looks vaguely frizzy. The me who always looks tired. The me who would be embarrassed to wear open-toed shoes because my pedicure is so very grown out. The me whose body is unrecognizable, who still looks 3 months pregnant most days...but hasn't been pregnant in over 14 months. The me who has to put on 2-3 outfits in the morning before I find one that makes me look like the me in my head...at least a little bit.

Honestly, I look at myself in the mirror and I get sad. If you were to look at me, I'm sure you wouldn't see what I see. You probably would think that I really don't look that much different than I did before I became a mom, and you probably would tell me that I'm lucky that I look the way I do for being a mom of twins. Rationally, I get that.

But, emotionally? Not so much. I look in the mirror and I literally think to myself, "Remember when I used to be beautiful?" I have voiced these words to my husband before--and, typically, he just looks at me like I'm crazy when I say this.

I think this is the problem with our society...or maybe just with me. Our standard of beauty is impossible to meet. Unless I quit my job, hired a full-time personal trainer, and didn't eat anything remotely sinful, I will never look like my 20-something self again. And, again, rationally, I know that. But, I can't wrap my head around it.

I'm a big proponent of aging gracefully--and I don't mind being 35. I certainly wouldn't want to be in my teens again, and I'm only vaguely wistful for my 20s, and only when I'm really missing my friends or sleeping late. The few grey hairs I have are badges of honor (unless my husband gets to them, and then he pulls them out of my head and they become garbage)--reminders that I have lived a full life so far, a life worth living. I love my little imperfections--like my strawberry birthmark on my stomach, or the mole on my chin--they are what make me unique. I don't have wrinkles, and I think I still look good for my age...I just don't feel like I look like me.

I love my c-section scar. That incision made me a mom. I wouldn't trade that for the world. But, I hate what my body looks like now. I used to have a waist...now I have a vague idea of where my waist used to be. I never had a muffin top before. Now, I could run a bakery with the amount of muffin top I have.  I have a hard time recognizing that maybe I need to buy a different size pants.

I don't write this for sympathy. I don't write this because I want you to say "You look great!" I write this because I want all of you out there who look in the mirror and think "Remember when I was beautiful?" to know you're not alone. I want to be reminded (and remember) that I'm still beautiful--I'm just not in my 20s anymore, and that's ok. Like I said, I like being in my 30s. I write this because I need to remember that my body looks the way it does because I grew two miracles--who make me laugh every day and who I wouldn't trade for anything. It's an honor to look the way I do--I earned this body through months of hard work growing two amazing little people.

I write this because I needed to. I hope that by getting these words down I can look in the mirror and think "I'm still beautiful"...and truly mean it.


Questions? Comments? Ideas? Email us at theaccessorizedlife@gmail.com

Thursday, February 27, 2014

Best "Off the Beaten Path" Baby Books

If you've ever been to, or had, a baby shower, you know there are some baby books that are classics--you know, the ones that people will get at least 2 copies of, and that every child has read. You know the ones...Goodnight Moon, Love You Forever, Guess How Much I Love You, Cat in the Hat, The Very Hungry Caterpillar and Brown Bear, Brown Bear, What Do You See. They're beautiful books. They're classics for a reason.

But, that doesn't mean you want to be the one to give the same baby book as everyone else.

In my twins' first year, I found that these books, while enjoyable, are not actually their favorites. Their favorites are ones that are not well known. These are the best "off the beaten path" baby books (not in any particular order)...take it from me. Give these as a gift and you'll be a hit! (If you click on any image or any title it will take you directly to where you can purchase the book online.)

1) Elmo's Mother Goose - Think your classic Mother Goose nursery rhymes with a Sesame Street twist.  The rhymes are catchy, interesting, fun, and addicting. This was an instant hit with my kids!


2) Baa Baa Black Sheep - This twist on the classic nursery rhyme is adorable. It includes sheep from every color of the rainbow and encourages kids to use their powers of imagination and silliness. My kids can't get enough of it!


3) That's Not My Monkey - When we recently went to a dear friend's house, my kids discovered this book. My son made me reread it to him no less than 10 times in a row and my daughter couldn't stop touching the fuzzy tongue. When we got home, I searched for it--I finally found it at Buy Buy Baby. It's still a tremendous hit with my kids! This book is part of a whole "That's Not My..." series, with items ranging from dinosaurs to planes to penguins and more. Each book is a sensory wonderland as every page has something for the children to feel.


4) Who's Hiding -This adorable lift-the-flap book from Skip Hop is a story of a mama owl trying to find her missing baby owl. My kids love lifting the very durable flaps and the story is a cute read. An instant hit in my house!


5) Peek a Who - This book is a fun take on peek a boo--one page says "peek a" and the opposite page has a small cut-out showing a snippet of what is hiding. It includes peek a moo (with a cow), peek a boo (with a ghost), peek a zoo (with a menagerie), peek a choo choo (with a train) and peek a you (with a mirror). My kids can't get enough of this book every time I bring it out--they just keep wanting to re-read it and re-read it and re-read it! (And, I just found out they are coming out with a companion called "Peek a Zoo" (involves guessing the animals) in March! Preordering it! My kids will be so excited.)


6) Dear Zoo - Another great lift-the-flap book! This one tells the story of a boy who wrote to the zoo asking for a pet, but every animal they sent just wasn't quite right. Kids enjoy lifting the flaps to see what animal is hiding, while at the same time, they love hearing the cute story.


7) Ten Wiggly Wriggly Caterpillars - My mom found this book on a clearance rack when my kids were just 3 months old. Well, she certainly made out like a bandit with this one. Now that they can pick what books they want to read, this one is always one of the first chosen. The caterpillars are raised, and my kids love to touch them. As you flip each page and go through the story, one disappears, until there is one lonely caterpillar left. But, don't worry, this story has a happy ending!


8) Fishy Tails or Farm Tails - These are our two favorites in a series of books by Jellycat. The books have animals with textured tails that kids can touch, pull or chew on (my kids' favorite activity). These two books are my favorite because they tell a story. The other ones are simply descriptive (like fluffy tail and curly tail in Kitten Tails), but all of the books are adorable. My kids love to play with the tails--not always to read the stories, but they always enjoy the books.


9) Do Cows Meow - This is another lift the flap book--with big flaps that open to reveal animals' mouths. It is a silly rhyming story that teaches animal sounds. My kids love, love, love this book. In fact, my son loves it so much that the cow's mouth has been ripped off and reattached from so much use. We also just purchased the second book in this series, Do Crocs Kiss.


10) Bubbles Bubbles - We received this book as a hand-me-down. It was an instant hit. The Sesame Street characters and fun rhyming story made this something that they could engage in from about 5 months on. I loved it so much that I tried repeatedly to find it for friends, but it wasn't available on any of the major book websites. We then got a second copy as a gift (which is awesome because now each kid can have his/her own), so I did some more research. Finally I found it...at the dollar store. What a steal! One dollar for a book that might, seriously, be my kids' favorite book on this list? Best. Bargain. Ever. You can't buy it individually online (but you can in the dollar store), but you can buy a case of 24 (which includes Bubbles Bubbles, At The Zoo, Eyes, Nose Fingers and Toes, and Nighty Night--all books my kids enjoy) for $24 online at Dollar Tree. I have seriously considered doing this so that I have a stash of awesome baby books to give away!

ADDENDUM!!!
11) LMNO Peas - We just got this book. The first time I read it to my kids, they were hooked. My son literally cried for me to give it to him so he could listen to me read it again. Both of my kids were busy doing other things and stopped when I started reading this book. They both kept handing it to me to read again. It is a super cute alphabet story about peas. Yup, peas. It's a fun read with bright illustrations. I can see this one being a favorite for years to come!


Now, here are some of my kids' other favorite books which are not quite classics, but not quite obscure either. You run the risk of giving a duplicate book if you give these, but it's unlikely as they aren't super popular. Plus, these are books that my kids absolutely love.

1) But Not the Hippopotamus - Sandra Boynton is well known for her colorful, silly, catchy children's books. We have several Sandra Boynton books, but this one is, by far, their favorite. It's a funny story of a left out hippopotamus, who, in the end, finds acceptance (spoiler alert!). It's a super cute rhyme that my kids just can't get enough of.


2) Little Blue Truck - This one is quickly becoming more and more popular. When I first discovered it it was an adorable and obscure little children's book. It tells the story of a friendly pick up truck, a conceited dump truck, and lots of little animals. It has animal sounds, great illustrations and keeps my kids' attention. What more could you want?


3) Thank You Bear - This sweet story of sharing is a beautiful read. My kids have enjoyed it from the first time I read it to them, and it continues to be one of their favorites.


4) I Love You Stinky Face - Another book that is quickly becoming extremely popular. (I did get two copies of this one at my baby shower!) It's a funny story of a little boy testing his mom's love. The illustrations are great and the cadence of the story keeps little ones entertained. My kids love this book!


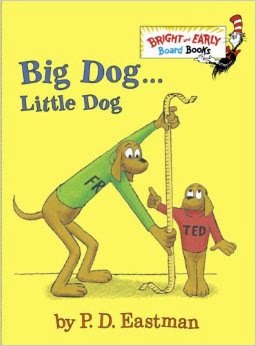
5) Big Dog, Little Dog - This was my absolute favorite book as a child. So, of course, I had to buy it for my kids. It's a tale of opposites. With brightly colored illustrations, it's a fun story that kids of all ages can enjoy.


Questions? Comments? Ideas? Email us at theaccessorizedlife@gmail.com

Tuesday, February 18, 2014

What I'm Coveting Now

I don't know about you, but it's been cold where I live. Really cold. I'm talking my car reads 1 degree cold. Polar vortex cold.

As I've stated before, I teach in a suburban New Jersey high school. Typically the building is fairly warm, and my classroom is usually so warm that even in the dead of winter, I need to have the windows open. But, due to this polar vortex hanging out over the Northeast, the building has been so cold lately. As a result, I have been looking for fun, stylish warm clothes and accessories. (Maybe this is what sparked my new scarf obsession!)

On one of the extraordinarily freezing days, one of my friends was wearing an amazing fur infinity scarf. I instantly fell in love with it. Not only was it gorgeous and stylish, it looked warm and cozy. I just wanted to snuggle up with it and, at the same time, enhance my outfit with it. I asked her where she got it--she told me that she got it two years ago (bummer #1). Then she told me it was real fur and she bought it for $90 (bummer #2). First and foremost, I'm a girl who believes in finding fabulous on a budget. Secondly, I'm not necessarily anti-fur, but I'm not really pro-fur either. I just don't see the need to buy the real stuff when I can get a reasonable facsimile. Plus, who wants to spend $90 on a scarf that I may not want to wear in a season or two?

So, I set out on a quest to find an adorable and affordable faux fur scarf.

Believe it or not, I found exactly what I was looking for in the strangest of locations...

I found a gorgeous, affordable faux fur infinity scarf at Restoration Hardware. Yup, that Restoration Hardware. The one where I like to browse gorgeous home goods at astronomical prices. Who would have thought that Restoration Hardware would sell accessories? Certainly not me! But, through the magic of Google, I found this beauty...


Gorgeous, right? You know what's even better? It's on sale for $16.99. (Ok, pick your jaw up off the floor!) Even when it was full price, at $49, it was still a deal, but at $16.99, it's impossible to pass up! I got it in lynx:


I cannot wait for this to show up at my door! Want one? Click here!

Love,


Questions? Comments? Ideas? Email us at theaccessorizedlife@gmail.com

Friday, February 14, 2014

Sweet Valentine


I remember being in elementary school and giving everyone a Valentine Card.  I loved going with my mom to pick out the fun box of cards to give all my friends.  Well, grown up me doesn't always give out cards. Now, I'm all about the baked goods!  I come from a baking family. My mom is an amazing baker, and everything I know I learned from her!  To me, baked goods = love!

This year I made some sugar cookies (recipe below) and will be giving them to my family and friends.


Now, I love icing on cookies and have searched for a good Royal Icing Recipe for years.  Well by some off chance, I finally found it!  I've always said to people that all my baked goods taste good, even if they might not look pretty.... Finally, finally, I feel like my cookies came out pretty!


Finished look! 

Different sizes

With some sprinkles

I hope everyone is having a Sweet Valentine!!

Love,


Sugar Cookie Recipe: Old family recipe:

2         Cups           Sifted Flour
1 1/2   teaspoon     Baking Powder
1/2      teaspoon     Salt
2/3      cup             Softened Butter
3/4      cup             Sugar
1                            Egg
1/2      teaspoon     Vanilla Extract
2         teaspoon     Grated Orange Peel
4         teaspoon     Milk

Mix Butter and Sugar together until Creamy.  Add Egg, Vanilla, Flour, Baking Powder, Salt, Orange Peel and Milk, Mixing after each ingredient.  Chill dough for 15 minutes. Then, using a pastry cloth and rolling pin, roll out some of the dough and use whatever cookie cutter you want (i like to make sure the dough isn't too thin)

Place on a cookie sheet that has parchment paper on it.  Bake for 11 minutes at 375 degrees.

Once the cookies are cool, then do the icing!


Royal Icing Recipe, Found at allrecipes.com

1/4 cup warm water
1 tablespoon light corn syrup
1/4 teaspoon almond extract
3 cups confectioner's sugar or more as needed.


Questions? Comments? Ideas? Email us at theaccessorizedlife@gmail.com

Wednesday, February 12, 2014

Valentine's Dinner...In a Snap!

With Valentine's Day rapidly approaching, Lauren and I made it our mission to create the perfect dinner to cook for your valentine, without it being too complicated, too fancy or too heavy.  (I mean, who wants to be feeling the food coma when you should be feeling your date...if you know what we mean!!)

This meal looks like it would be a difficult meal to put together...in other words, it looks fancy schmancy. However, it is easy, delicious, and mostly healthy!

For our dinner, we decided on making roasted chicken caprese for our main course with roasted mixed vegetables as a side.

Veggies for Roasting
For the roasted vegetables, we decided to use a mix of red peppers, green peppers, red onion, eggplant and zucchini. Feel free to adapt your vegetable choices to your and your guests' unique tastes-- Lauren hates mushrooms, thus why we didn't include them, but Stacy loves them!  We just cut the veggies into chunks/strips (all roughly about the same size so they cooked at the same rate) then drizzled them with olive oil, garlic, oregano and pepper and roasted them in the oven for about 60 minutes at 375/350 degrees. In fact--we roasted the veggies at the same time as we made the chicken and the roasted tomatoes (see--this meal is EASY PEASY!!)

Sauce for our Chicken
The roasted chicken caprese is easy to make. All you need to be able to do is measure a few ingredients, cut up tomatoes into quarters, cut up mozzarella cheese into cubes, squeeze a lemon, chop some basil, put it all together and throw it in the oven. So. Easy. Now, Lauren and I are all about making our lives super, duper simple. So, we bought the thin sliced chicken breasts--they are more expensive, but they are such a time saver. If you want to save money, or if you like your chicken breasts a little thicker, get the family pack or the regular chicken breasts--you can cut them into thinner breasts, or cook them as is. Your choice.  For the mozzarella, we used the packaged kind you can find in your grocer's dairy case.  We find that it tastes delicious and is a little lighter on your wallets.


Dessert is Assembled!
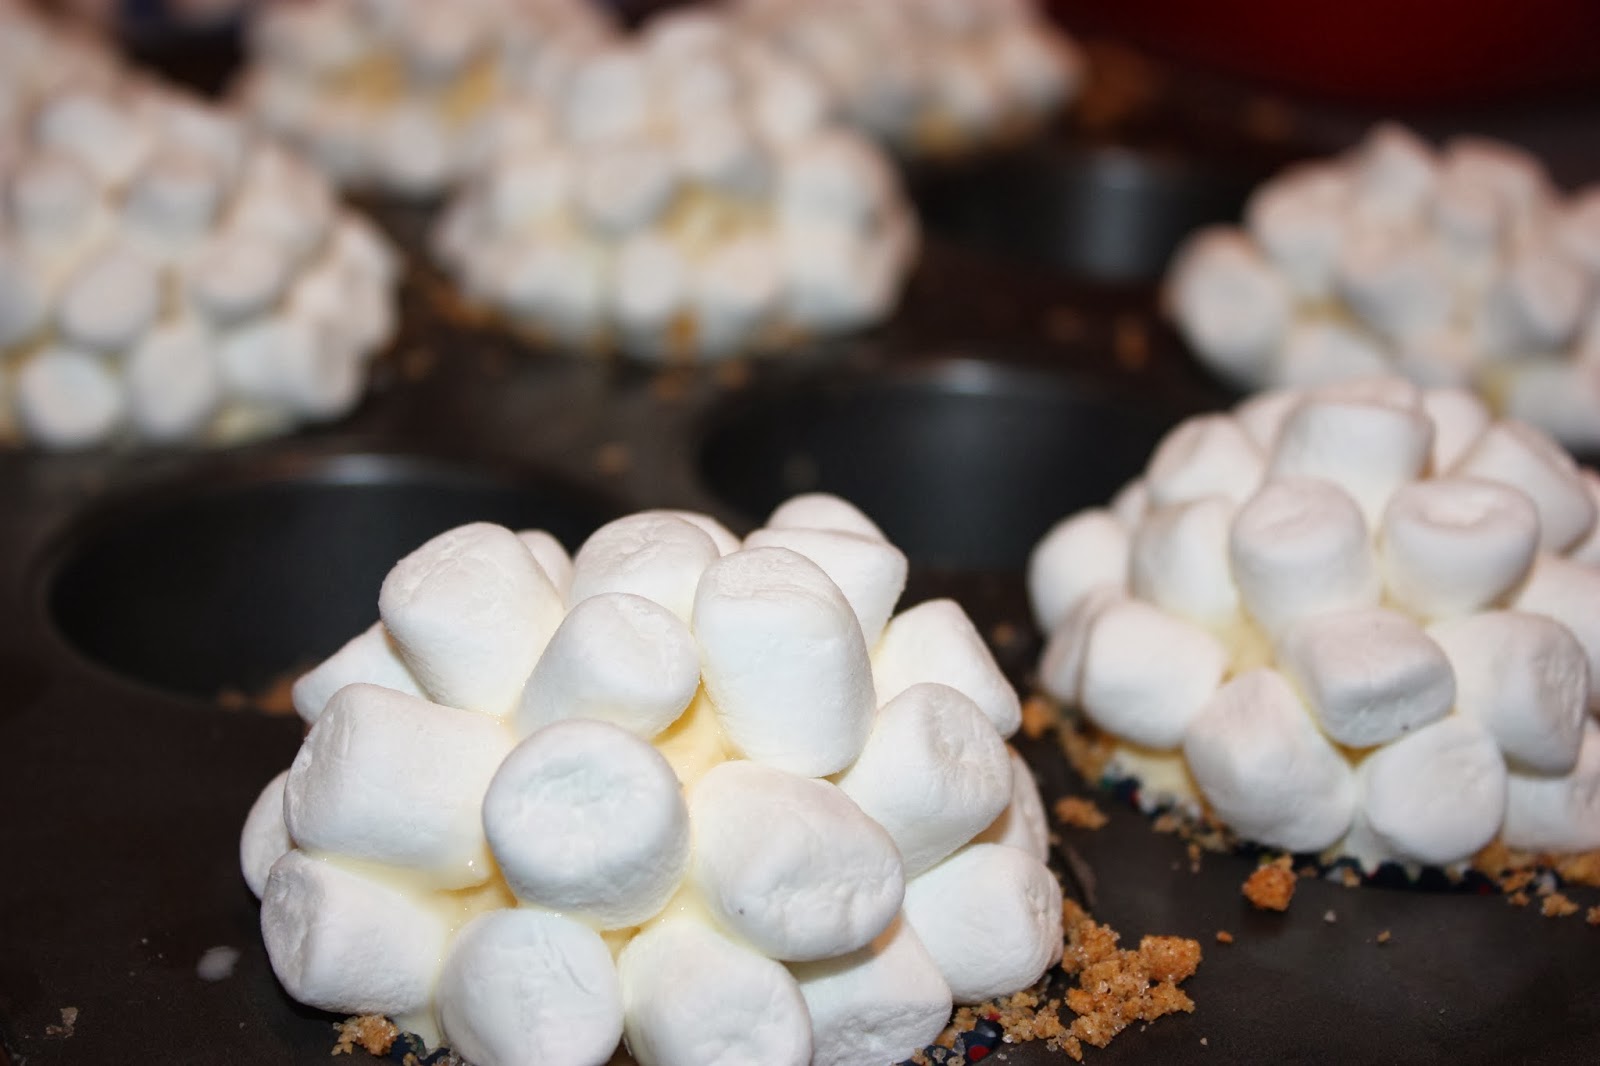
And, what good is a romantic meal without a special dessert? We made indoor s'more sundaes. Yes, they were as amazing as they sound. They look so fancy and like they'd be such a difficult thing to make, but, they were the complete opposite.  All you need to be able to do is crush a few graham crackers, melt some butter, scoop some ice cream, put it in the freezer and then under the broiler. The recipe says you should melt semi-sweet chocolate morsels to make a chocolate sauce. But, as the evening went on, we found making the chocolate sauce right after dinner, because we wanted it to be fresh, would take too much time, so we went with Hershey's chocolate syrup instead. This dessert wowed our guests!  Once dessert hit the table the talking was at a standstill and everyone became way more interested in the cupcake style desserts than catching up on their daily activities.  (We can't wait to make these again for a dinner party or a girls' night in or any other special occasion like, you know, next Tuesday, a snowy Saturday...)

The dinner? Deceptively simple, filling without being heavy, delicious and a huge hit.

When you have the best Valentine's Day dinner ever, you can thank us. We accept cash, checks, jewelry, cookies... Just kidding (mostly). Hope you have the best Valentine's Day!

Our Completed Dinner


The Best Dessert Ever


Love,


The recipes are as follows:

Roasted Chicken Caprese -- Serves 4

4 boneless skinless chicken breasts (1lb)
6 medium roma tomatoes (or whatever's in season)
1 tsp sugar
1 tsp kosher salt
1/4 cup olive oil
8 oz. mozzarella cheese, cut into 1/4" pieces
1/4 cup fresh basil, chopped
1/2 tsp black pepper

Lemon Vinaigrette:
2 tbsp fresh lemon juice
1 clove garlic, minced
3/4 tsp kosher salt
1/2 tsp black pepper
1/4 cup olive oil

Place chicken in 1 gallon zipper bag. Add lemon vinaigrette, seal and marinate in fridge for at least 30 minutes.

Preheat oven to 375 degrees

Cut each tomato into quarters, lengthwise. Place them in a medium bowl and gently toss with sugar, salt and olive oil. Spoon tomato mixture onto a rimmed cookie sheet so tomato pieces don't touch. Roast for 30 minutes. Spoon tomatoes and all accumulated juices into a small bowl. Add the cheese, basil leaves and pepper, tossing gently. Let this mixture sit at room temperature while the chicken cooks.

Reduce the oven temperature to 350 degrees. Remove the chicken from the marinade and discard the marinade. Place the chicken on the same cookie sheet. Roast for about 30 minutes, turning once, or until cooked.

Spoon the tomato and mozzarella mixture over the chicken and serve.

Indoor S'more Sundae -- Serves 4

Graham Cracker Crust:
3/4 cup graham cracker crumbs (about 5 whole graham crackers)
3 tbsp butter, melted
2 tbsp sugar
1/2 tsp cinnamon
Salt (just a pinch)

4 scoops vanilla ice cream
1 1/2 cups mini marshmallows

Quick Chocolate Sauce:
1/2 cup semisweet chocolate chips
2 tbsp whole milk

For the graham cracker crust: Mix the graham cracker crumbs, butter, sugar, cinnamon and a sprinkle of salt together in a bowl. Firmly press the crust into muffin tins to make individual crusts. Top each crust with a scoop of vanilla ice cream. Press the mini marshmallows into the ice cream, covering the scoop completely. You will have 4 s'more "domes." Freeze at least 1 hour.

For the quick chocolate sauce: Immediately before serving, heat the broiler to low. Toss the chocolate chips with the milk in a ramekin or small bowl and microwave 30 seconds. Stir until smooth and set aside. Place the s'more domes under the broiler until marshmallows brown, about 30 seconds. Watch them constantly as they burn easily. Place each s'more on a plate and drizzle with the chocolate sauce.

Questions? Comments? Ideas? Email us at theaccessorizedlife@gmail.com

Tuesday, February 4, 2014

Paying it Forward -- Preemie Cap Style

As I mentioned previously, my twins were born 7 weeks early. As a result, they were in the NICU for nearly 4 weeks. My husband and I became very close with the NICU nurses, and we think of them, and our time there, often.

While my kids were in the NICU, they received some adorable knitted caps that had been donated. Since I am an avid knitter, I made preemie caps for my kids while they were there. The pattern was super easy--each cap takes about 2 hours from beginning to end--and I promised myself that one day, I would pay it forward and make preemie caps to donate to the NICU as a stashbuster, and as a good deed. (For all you non-knitters out there, stashbuster is when you do a project just to use up your leftover yarn from other projects!)

In October, I started thinking about the fact that my kids were turning 1 fairly soon. I wanted to do something bigger than a birthday party to commemorate the day. I felt that it was important to acknowledge and thank the NICU nurses who selflessly gave of themselves to nurse my babies to health. I decided it was time to cash in that promise to pay it forward, so I put out a call on facebook to all of my friends and family who knit and crochet that I was doing a preemie cap drive for the NICU and wanted to collect as many caps as I could before the kids' birthday. I wanted to drop them off at the NICU on their birthday, with a thank you note for the nurses and a recent picture of the kids.

I put all of my other projects on hold, dug out all of my non-allergenic stash yarns, and embarked on this project. I would have been happy to create 5 on my own, and maybe donate 10-15 total. Well, once I got on a roll, I got obsessed (like I do with many of my projects) and got more and more creative as the project went on. I ended up knitting 15 hats myself (photos of each one below), and received another 19 from friends and family. In total, I was able to donate 34 preemie caps to the NICU.


All of the preemie caps I made

I enjoyed this project so much, that I decided that I want to do it every year. I will knit a cap every now and again, whenever I have a few hours to spare and feel like I just want to knit something quick and easy. I hope that my friends and family will once again be generous with their time and yarn and help donate to this project. I hope to donate twice as many to the NICU this year as I did last year, and I hope that other friends and family members who knit or crochet will join in the project.

All of the caps I donated
Hopefully the parents who are going through the same difficult journey that we did will get an ounce of comfort from the lovingly crafted handknit caps that their babies will receive. Hopefully, when their healthy child comes home, they will put the cap in a special place--just like I did with the caps my twins received--to take out once in a while to remember how far they've come and how lucky they were to have the most amazing, caring, attentive NICU nurses.

Click me for the preemie cap pattern if you knit and want to donate some to your local NICU!

Close ups of all of the caps I made:


Love,


Questions? Comments? Ideas? Email us at theaccessorizedlife@gmail.com